I started with an inexpensive clock from Dollar General.


- Remove the clock from the box, flip over and remove all the screws around the outside which should remove the frame and glass.
- The clock hands come off fairly easily, just be sure to lift them one at a time
- Use the frame as a template, hold pencil straight up and draw a circle


- my clock was larger than 8-1/2" so I layed 2 pieces of cardstock side-by-side so there is a large piece and an extra sliver
- center large piece over clock face and press to get the center mark
- cut or punch a hole in the center
- apply face to the front using hole as a guide for the nose


- apply Tombow mono adhesive to the back of the orange pieces and let dry
- attach orange pieces to clock front
- pop clock hands back on
- lay glass and frame on top, flip, and put screws back in
cardstock: Stampin' Up! Only Orange
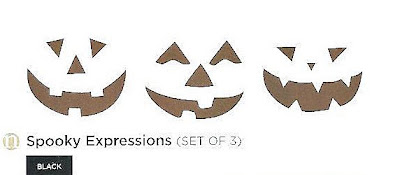
face: Decor Elements decorative vinyl Spooky Expressions

Thanks for stopping by and have a great day!
Tasha


4 comments:
So clever. Maybe I'll do that with my Spooky Expressions!
hi, Tasha
what a great idea!
Regina
We don't celebrate Halloween but I can definitely see me doing this to personalize for gifts...awesome! My mind is spinning ideas already! THANKS!
Just adorable! Very creative idea!
Post a Comment